As of October 1st, Microsoft has released SharePoint Syntex to Microsoft 365. Now, what exactly IS SharePoint Syntex? SharePoint Syntex comes from the Project Cortex initiative from Microsoft, and it is essentially a Machine Learning service that can pull information from your documents and add it as Metadata in a SharePoint Library. As someone who has worked with Metadata in SharePoint, and speaking on behalf of all my clients, I can honestly say “It’s about time!”
Let’s Rip some Metadata
So, let’s dive right in with a personal use case of mine. I have a nice big folder in my OneDrive that contains all of my expense receipts from my time at my current company. It contains all flights, car rental, taxi, uber, etc. For our needs today, I want to extract the total amount I spent on each Delta flight for the past 5 years. We’ll start by getting SharePoint Syntex enabled in the Tenant, Create and Train our model, and then get it applied to all of my expenses in a SharePoint library.
Step 1: Get SharePoint Syntex Enabled and Configured
The first thing you will need in order to leverage SharePoint Syntex, is a license. Our friends at Microsoft offer a free trial, which can be found here: https://www.microsoft.com/en-us/microsoft-365/enterprise/sharepoint-syntex?activetab=pivot%3aoverviewtab
- Sign up for the trial, or if you already have purchased licenses, make sure it is enabled on your user in the M365 Admin Center. While in the Admin Center, click on “Setup” on the left hand Nav and scroll down until you see the “Organizational knowledge” section. Click on “Automate content understanding” to start the setup.
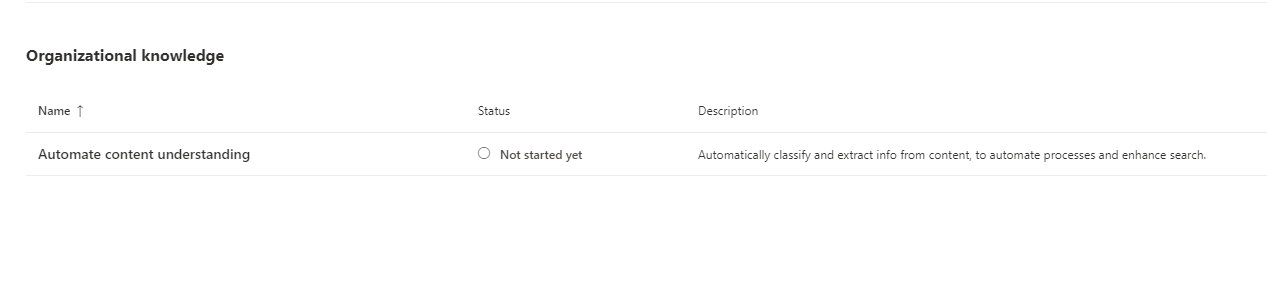
2. On the “Automate content understanding” screen, click on “Get Started”

3. During the setup Wizard, we’ll have the options to select where these models will run (i.e. the Document Libraries that can leverage the models), as well as create a Content Center, where the models can be created and managed. For this blog, I’m just going to select a specific site, but you have the option to apply this to all sites, a specific site, or you can upload a .csv with all the sites you’d like to apply this to:


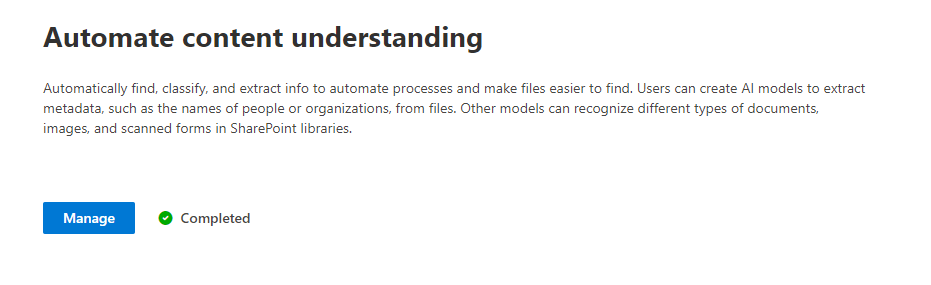
4. Once you have run through the setup wizard, you will see a “Completed” icon. The settings you defined can be changed anytime, by coming back here and clicking “Manage”
Step 2: Time to create a Model!
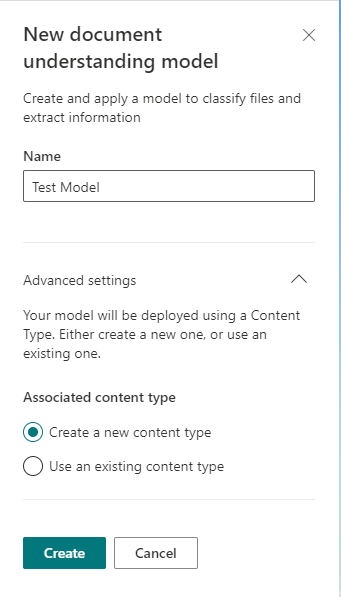
Now that setup is complete, let’s head over to Content Center we created during setup. On the main page we can create a “Document understanding model.
- Click New -> “Document Understanding model”

2. On the menu that pops up, give the model a name (NOTE: This will also become a Content Type, so I would avoid any of the standard content type names , i.e. Article, Document. Also, I’d avoid using the acronym for Document Understanding Model. DUM-Content Type seems iffy 😀 ).
3. Under Key Actions, our first step will be to add example files, that Syntex can use to train it’s recognition. Click on Add Files, and then Upload at least 5 files that contain your example. Be sure to include 1 that is dissimilar. In my case, I uploaded 7 flight receipts from Delta, and 1 receipt from my cell phone. All of these files reside in the Folder we will use after the model is created.


4. Next, we’ll classify the documents we uploaded as either a part of the model or not, so Syntex know what documents are the right ones to classify. From Key Actions, click on Train Classifer. Click through each document and Approve or Reject each document depending on whether the model should recognize it or not.


5. We can also add “Explanations” to the labeling to ensure that our documents are better identified. Explanations can be specific Word or Phrases, they can be be a specific Patter (i.e. Date, Time), or it can be the proximity between 2 other explanations (i.e. Word next to a date). This helps ensure Syntex can classify documents properly once it comes time to apply this to a large amount f files. In my case, I created a “Pattern List” explanation that includes the Phrases “Flight”, “Transportation”, and “Delta”. I can add and improve on this list if need to be to improve my classification.


6. Once this is in Place, I ‘ll click on “Test” to test the model out on any files I uploaded that I did not classify at the beginning, and I can then modify as needed to help improve the model.

7. Now, return to the “Key Actions” screen, and click on “Create and Train extractors. An extractor is what we’ll use to get the values out of the documents that we want to turn into Metadata. On the Screen that Pops up, give the extractor a name, and then click create.

8. You’ll notice this screen is very similar to the classification screen, but this time, we will want to go through each file and highlight the value we want to extract. As you can see, I have highlighted a total amount that was in the receipt.

9. As with classifying, we can also create explanations to ensure Syntex can find the correct values we want. I’ve created another Phrase list for Amount, and one of the consistent parts of each of these receipts is that it is preceded by “Ticket Amount” this tells Syntex that if it finds a value after this phrase, it’s probably what I’m looking for.

10. Syntex will attempt to use the explanation to ensure that what I labeled, matches the explanations I have provided. As you can see below, I accidentally labeled one of the receipts in the wrong location. What I labeled is in Blue, but Syntex expected it to be the value in Green.

11. After I correct any labeling mistakes, I can then test the extractor on any uploaded files that I didn’t use for labeling
12. Lastly, we’ll want to apply our Model to the Document Library(ies) that it will be run against. From the “Key Actions” page, click on “Apply Model to libraries”. On the Popup that opens, navigate the document library you want to apply the model to, and then click “Add”. We’ve not create and applied a Syntex Model!

Step 3: Run that Model!
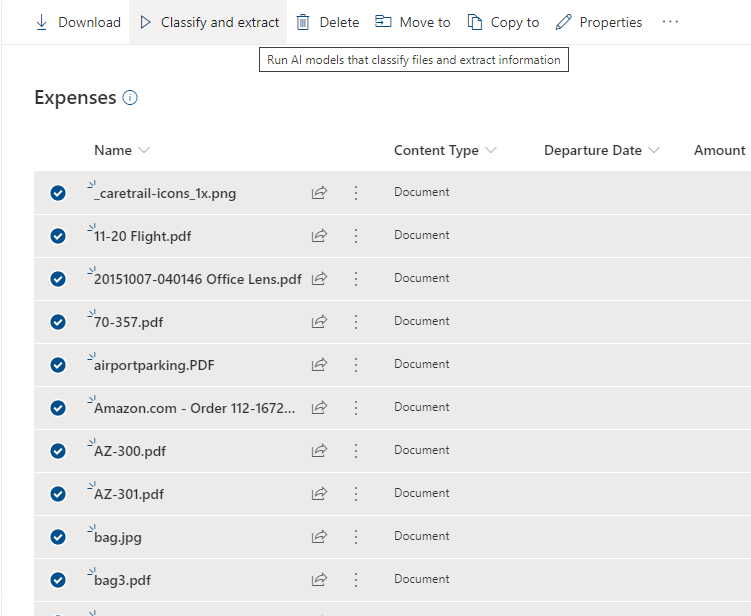
- Head over to the document library that you applied the model too. If you selected to apply the new view when you applied the model, you will now be able to see the options to Classify an Extract your documents. For this document library, I uploaded my “Expenses” Folder to the document library, and then modified the view to show a flat structure, as opposed to folders. Now I can select all of my documents, and then click “Classify and Extract”….
2. ….Which then fails. Apparently Syntex will not allow you to use a flat structure to Classify the doc, you will have to return to the folder structure view and either select each doc individually and then “Classify and Run”. (This is a glitch that Microsoft will need to resolve. Syntex is brand new, so Ill cut them some slack) OR, since the model will automatically run when a new document is uploaded, you can delete and Re-upload all of the documents. I DON’T recommend doing the latter option on Production data for obvious reasons, but for our needs for this demonstration, I went ahead and did that for brevity

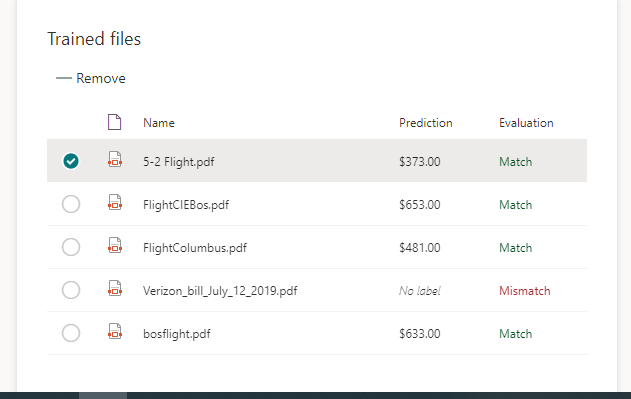
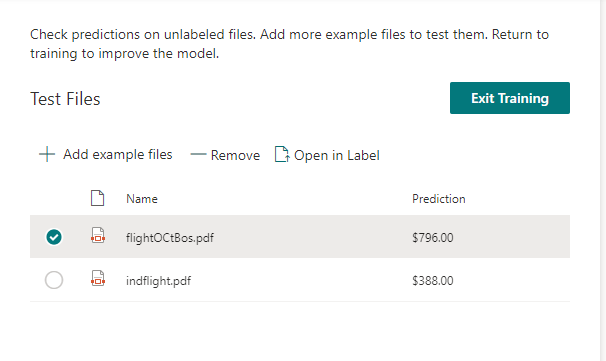
3. You may need to wait a few minutes for the model to chew through all the documents, but you should start to see the documents get classified, and the extractors work their magic!! As you can see below, I now have all the total amounts from my Delta flight receipts now in a column of Metadata!!!

4. Or do I? It seems there are a couple of documents it classified, but didn’t extract on:

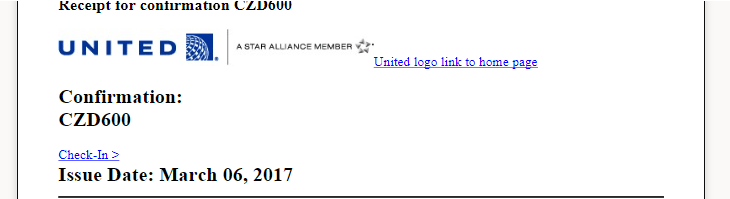
5. Oh, never mind, that was just the couple of times I flew United 🤣🤣🤣🤣🤣
I hope this hands-on might be useful for all the Content Managers and SharePoint Admins out there who have been banging their heads against the wall trying to find a better way to get documents classified. As always, please feel free to reach out to me at jo.karnes@centricconsulting.com if you have any questions.

Hi, I am the engineer for sharepoint Syntex. Thanks for the blog, I just want to clarify that “aparently Syntex will not allow you to use a flat structure to Classify the doc, you will have to return to the folder structure view and either select each doc individually and then “Classify and Run”. ” is not needed, we fully support you select all file from the flat structure to run it,
I wonder if you can try to repro again? If not, give me the Url for one or two files and time you run the classify and extract, we can do some investigation
LikeLike
I am Mingquan, the Engineer manager for Syntex feature, read from your bug on the following, I can repro it, and I found out the issue, we did not handle flat view correctly, it should be an easy fix, will fix it in a week, Thanks again!
2. ….Which then fails. Apparently Syntex will not allow you to use a flat structure to Classify the doc, you will have to return to the folder structure view and either select each doc individually and then “Classify and Run”. (This is a glitch that Microsoft will need to resolve. Syntex is brand new, so Ill cut them some slack) OR, since the model will automatically run when a new document is uploaded, you can delete and Re-upload all of the documents. I DON’T recommend doing the latter option on Production data for obvious reasons, but for our needs for this demonstration, I went ahead and did that for brevity
LikeLike