Recently, I had a client who was interested in building a PowerApp Canvas App for Mobile Devices that would take some of the more routine aspects of their Dynamics sales process, and provide their sales people with an easier way to do some of the tasks associated with capturing customer information. This particular client’s users just didn’t like using Dynamics, and they wanted to streamline this for them without needing to use the Dynamics Mobile App. Canvas Apps to the rescue!
One Search to Rule them all
When I started this project, I admittedly didn’t have a deep knowledge of Dynamics. As a part of the App, the client wanted a single search interface whereby users could search across Contacts, Accounts, Leads and Opportunities, and have those presented in one pane of glass. My immediate thought was to simply use an input control and a gallery to display the results, but with Galleries, they really want a single data schema and data source in order to display information. With these tables, the data schema was decidedly different across each of them. After doing some digging, I realized my best option was to use the Dynamics Relevance (now Dataverse Search) Search API. With this being my first real exposure to that API, I immediately went to see if anybody else has ever done this type of work before, and I cam across this blog: https://www.inogic.com/blog/2021/01/use-relevance-search-api-in-power-automate-canvas-app-part-1/ . This particular solution relied on using a Canvas App and then calling a Power Automate flow to retrieve the results from the Relevance Search API. While it certainly performed the job, what I also found was that the lag between clicking the button in the Canvas and the Power Automate returning results would be unacceptable for my client. So, I figured, why not just let Power Apps query it directly?
Please Mr. Postman
So, my first step into understanding how to query the Search API and return the results I was looking for, was to read the Documentation out on Microsoft’s site: https://docs.microsoft.com/en-us/powerapps/developer/data-platform/webapi/relevance-search. This provided me with the necessary syntax to be able to query the API with a POST command. From here, I knew I wanted to test it to actually make sure I could get results returned. This is where Postman comes into play. Microsoft also provides a tutorial on how to connect to the Relvance Search API using Postman, especially around Authenticating to service, which I found invaluable: https://docs.microsoft.com/en-us/powerapps/developer/data-platform/webapi/setup-postman-environment . By following that tutorial, you’ll be ready to try out a simple query. In my case, I had some test data with my name in Dynamics, so I did a search on it. If everything is working properly, you should see a response like the one below:

“search”: “Jo Karnes”
}
In that search, I simply tested it with a search term query, in this case “Jo Karnes”. This particular search would search across all of the Dynamics tables that have been configured to be searched through Relevance Search (see here for instructions on how to configure tables for this: https://docs.microsoft.com/en-us/power-platform/admin/configure-relevance-search-organization), but the requirement for this app was to only return results across 4 specific tables. So we need to specify those tables in the Body of our request. We can do that by defining those entities as shown below:
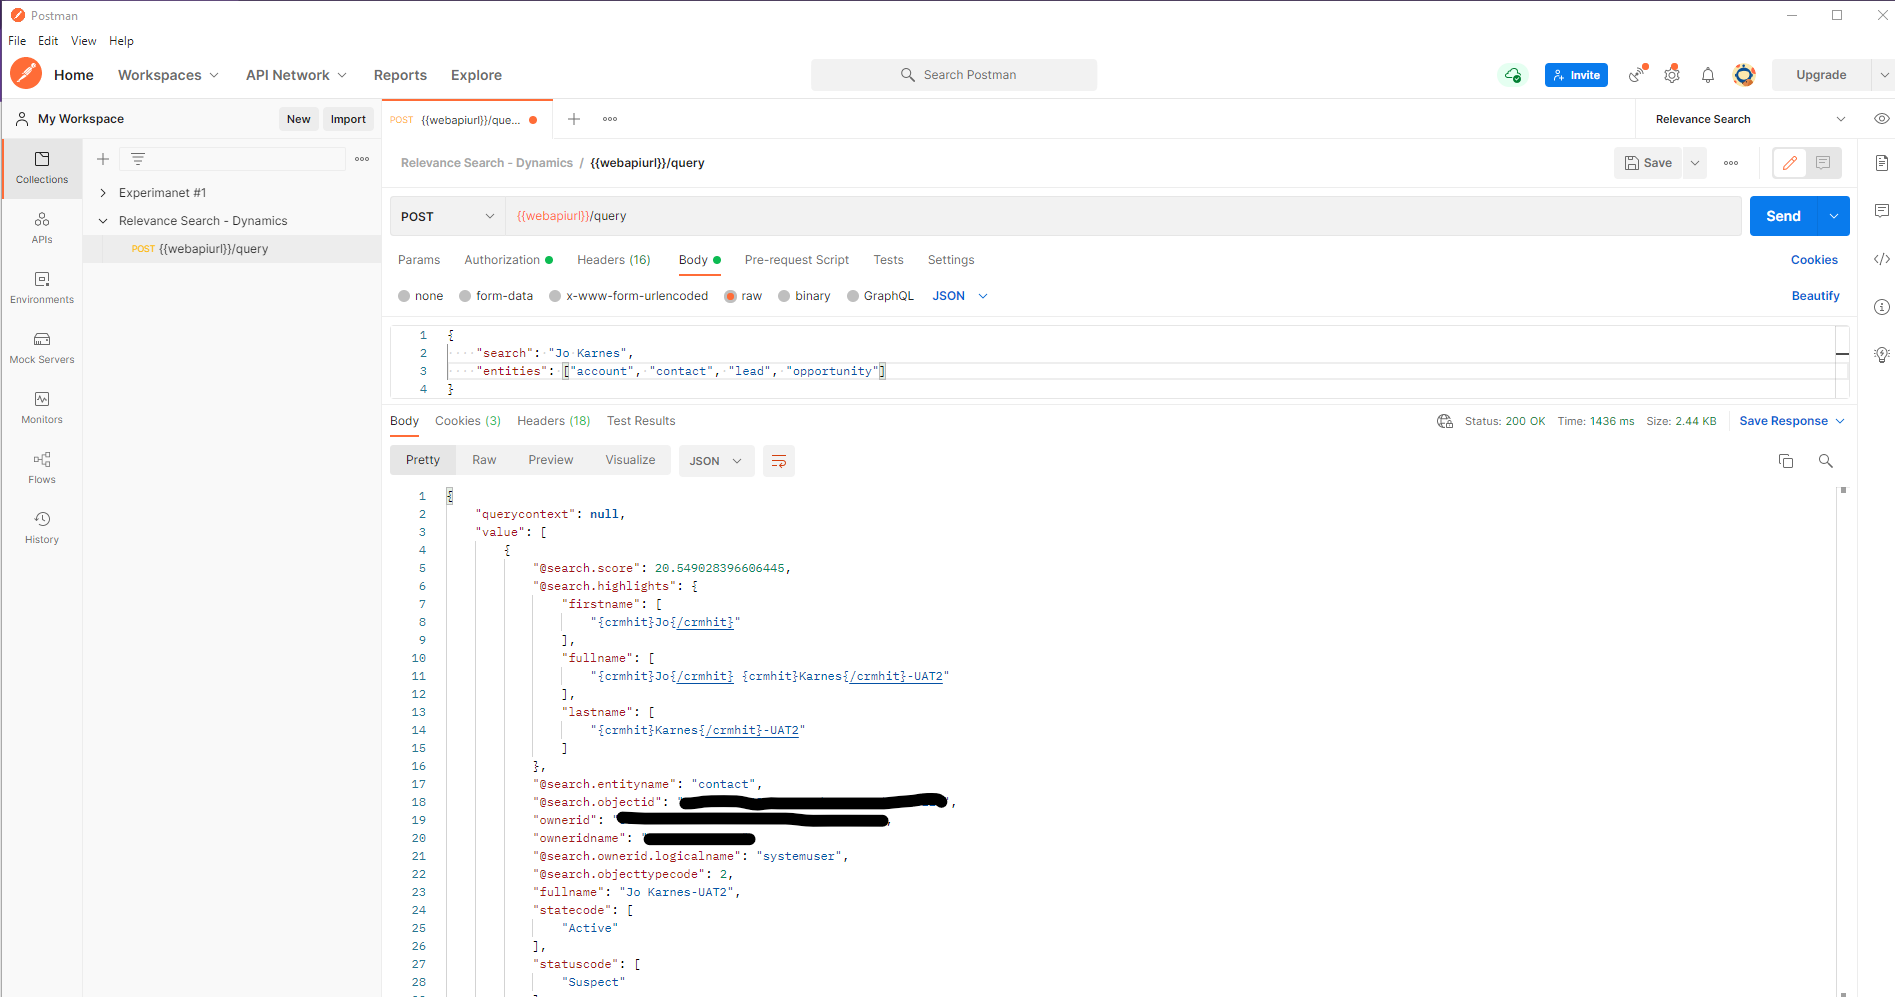
“search”: “Jo Karnes”,
“entities”: [“account”, “contact”, “lead”, “opportunity”]
}
Now, my results should only return results from those 4 tables, and we’ve successfully tested a search query to the API! Now we need to get our Canvas app to be able to do the same thing.
Did you know that Dynamics licensing allows you to create Custom Connectors for Power Apps?
Now you do! Power Apps licensing can be quite confusing sometimes, but if you have certain Dynamics licensing, you can use Custom Connectors! (unlike the Power Apps license included in Office 365). The specific licenses you’ll want to have for this are either a PowerApps per App or Per User license or:

Create the Custom Connector! – Well, let’s configure Authentication first.
So, we’re ready to create the Custom conenctor that our Power App will use to conenct to the Relevance Search API. But first things first, we need to add an Azure AD app registration for the API. This will allows us to use delegated permisisons to Dyanmics so that way, the logged in user to Power Apps can pass thier credentials from PowerApps, to the API seamlessly. Microsoft has provided a guide for creating this app registration here: https://docs.microsoft.com/en-us/powerapps/developer/data-platform/walkthrough-register-app-azure-active-directory. When you’ve created the App registration, save the ClientID, DirectoryID, and the Client Secret to Notepad, we’ll need these values when creating the custom connector.

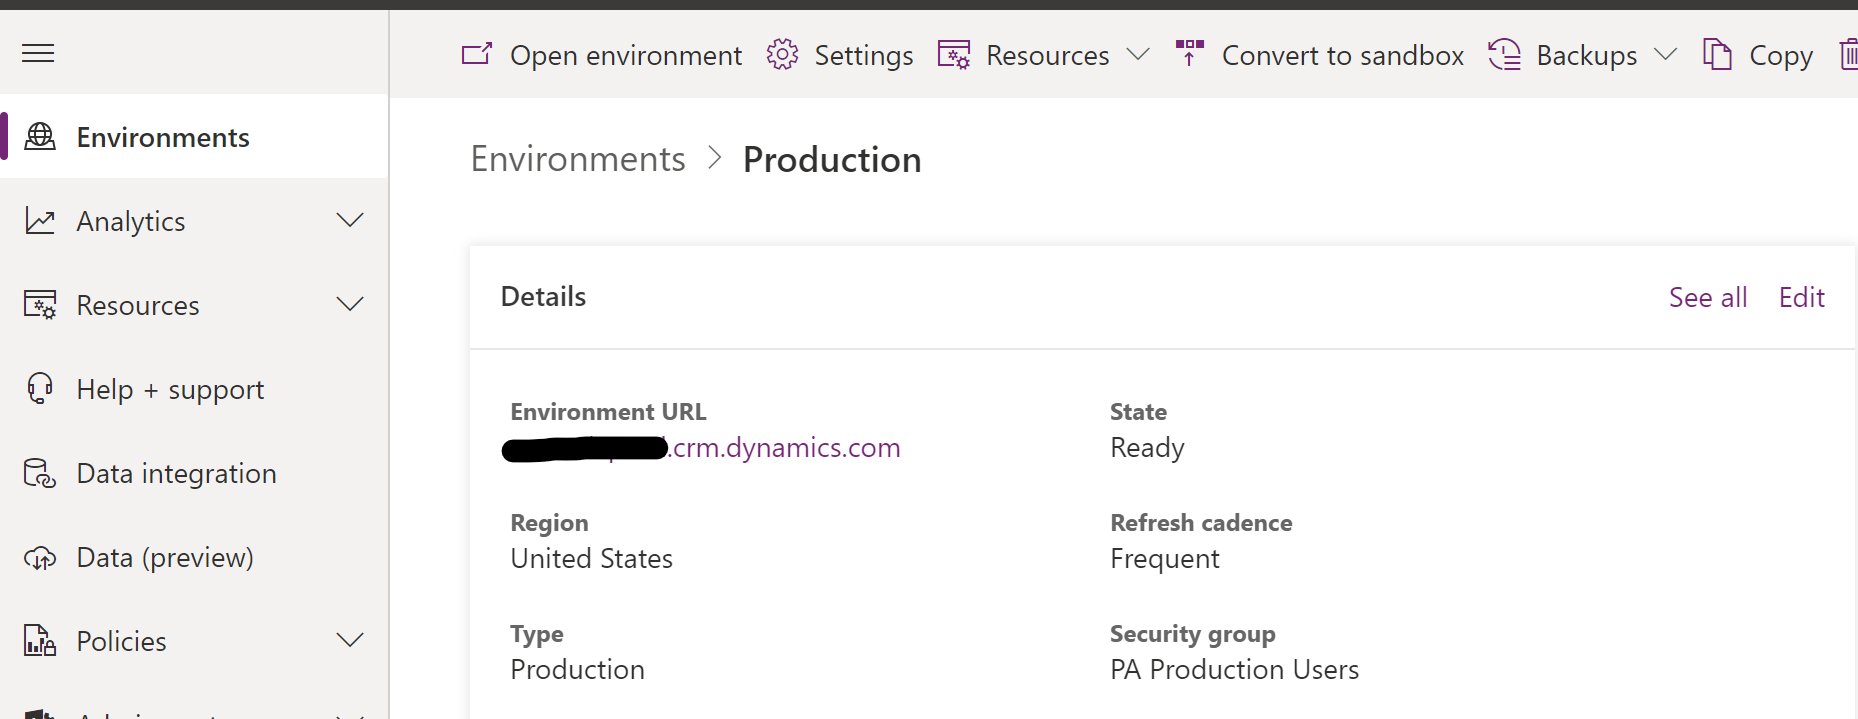
You’ll also want to get the endpoint for your dynamics environment. This will be in this format: https://<environment>.crm.dynamics.com/. You can find the exact endpoint of your environment by going to https://admin.powerplatform.microsoft.com/, clicking on the environment where you want to search, and you’ll see the Environment URL in the details:
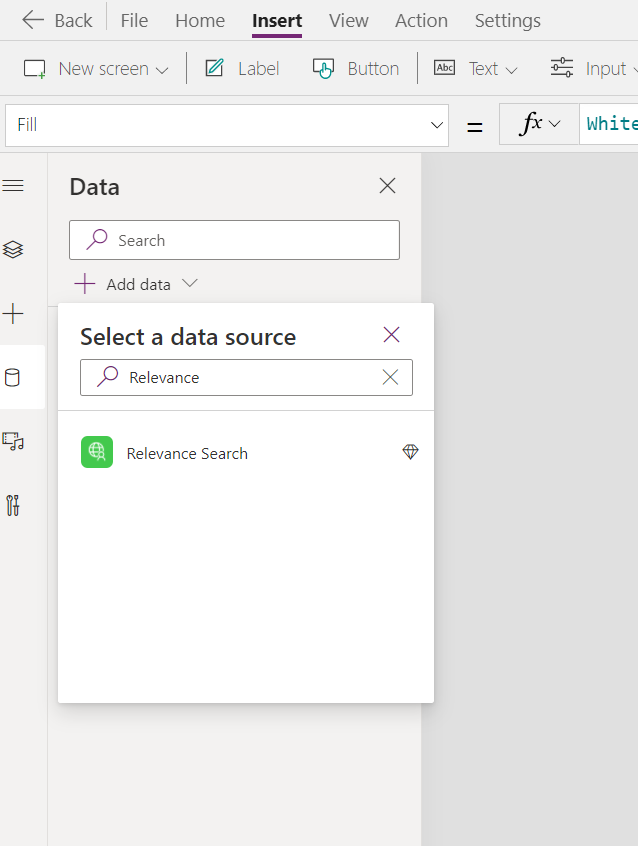
Now that we have all of this information, it’s time to create our Custom connector. Head over to make.powerapps.com, click on Data, and then click on Custom Connectors

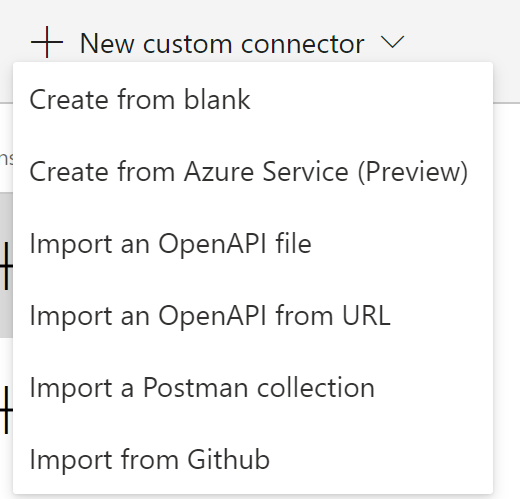
From here, we’re going to want to Create a new Connector, ‘From Blank’
On the General Tab, you can define an Icon, and a description, but the most important hing on this screen is the Host url. This will be the environment name we captured above. When its entered in, click on the Security Tab.

For Security, we have a few things to define. First, Change the Authentication type to “OATH 2.0”, then select the Azure Active Directory Identity provider. From here, populate the ClientID, Client Secret, and Resource URL. The Client ID and Secret can from our Azure AD app registration, and the Resource URL is the Environment path, but with https://. When complete, click on the Definition tab.

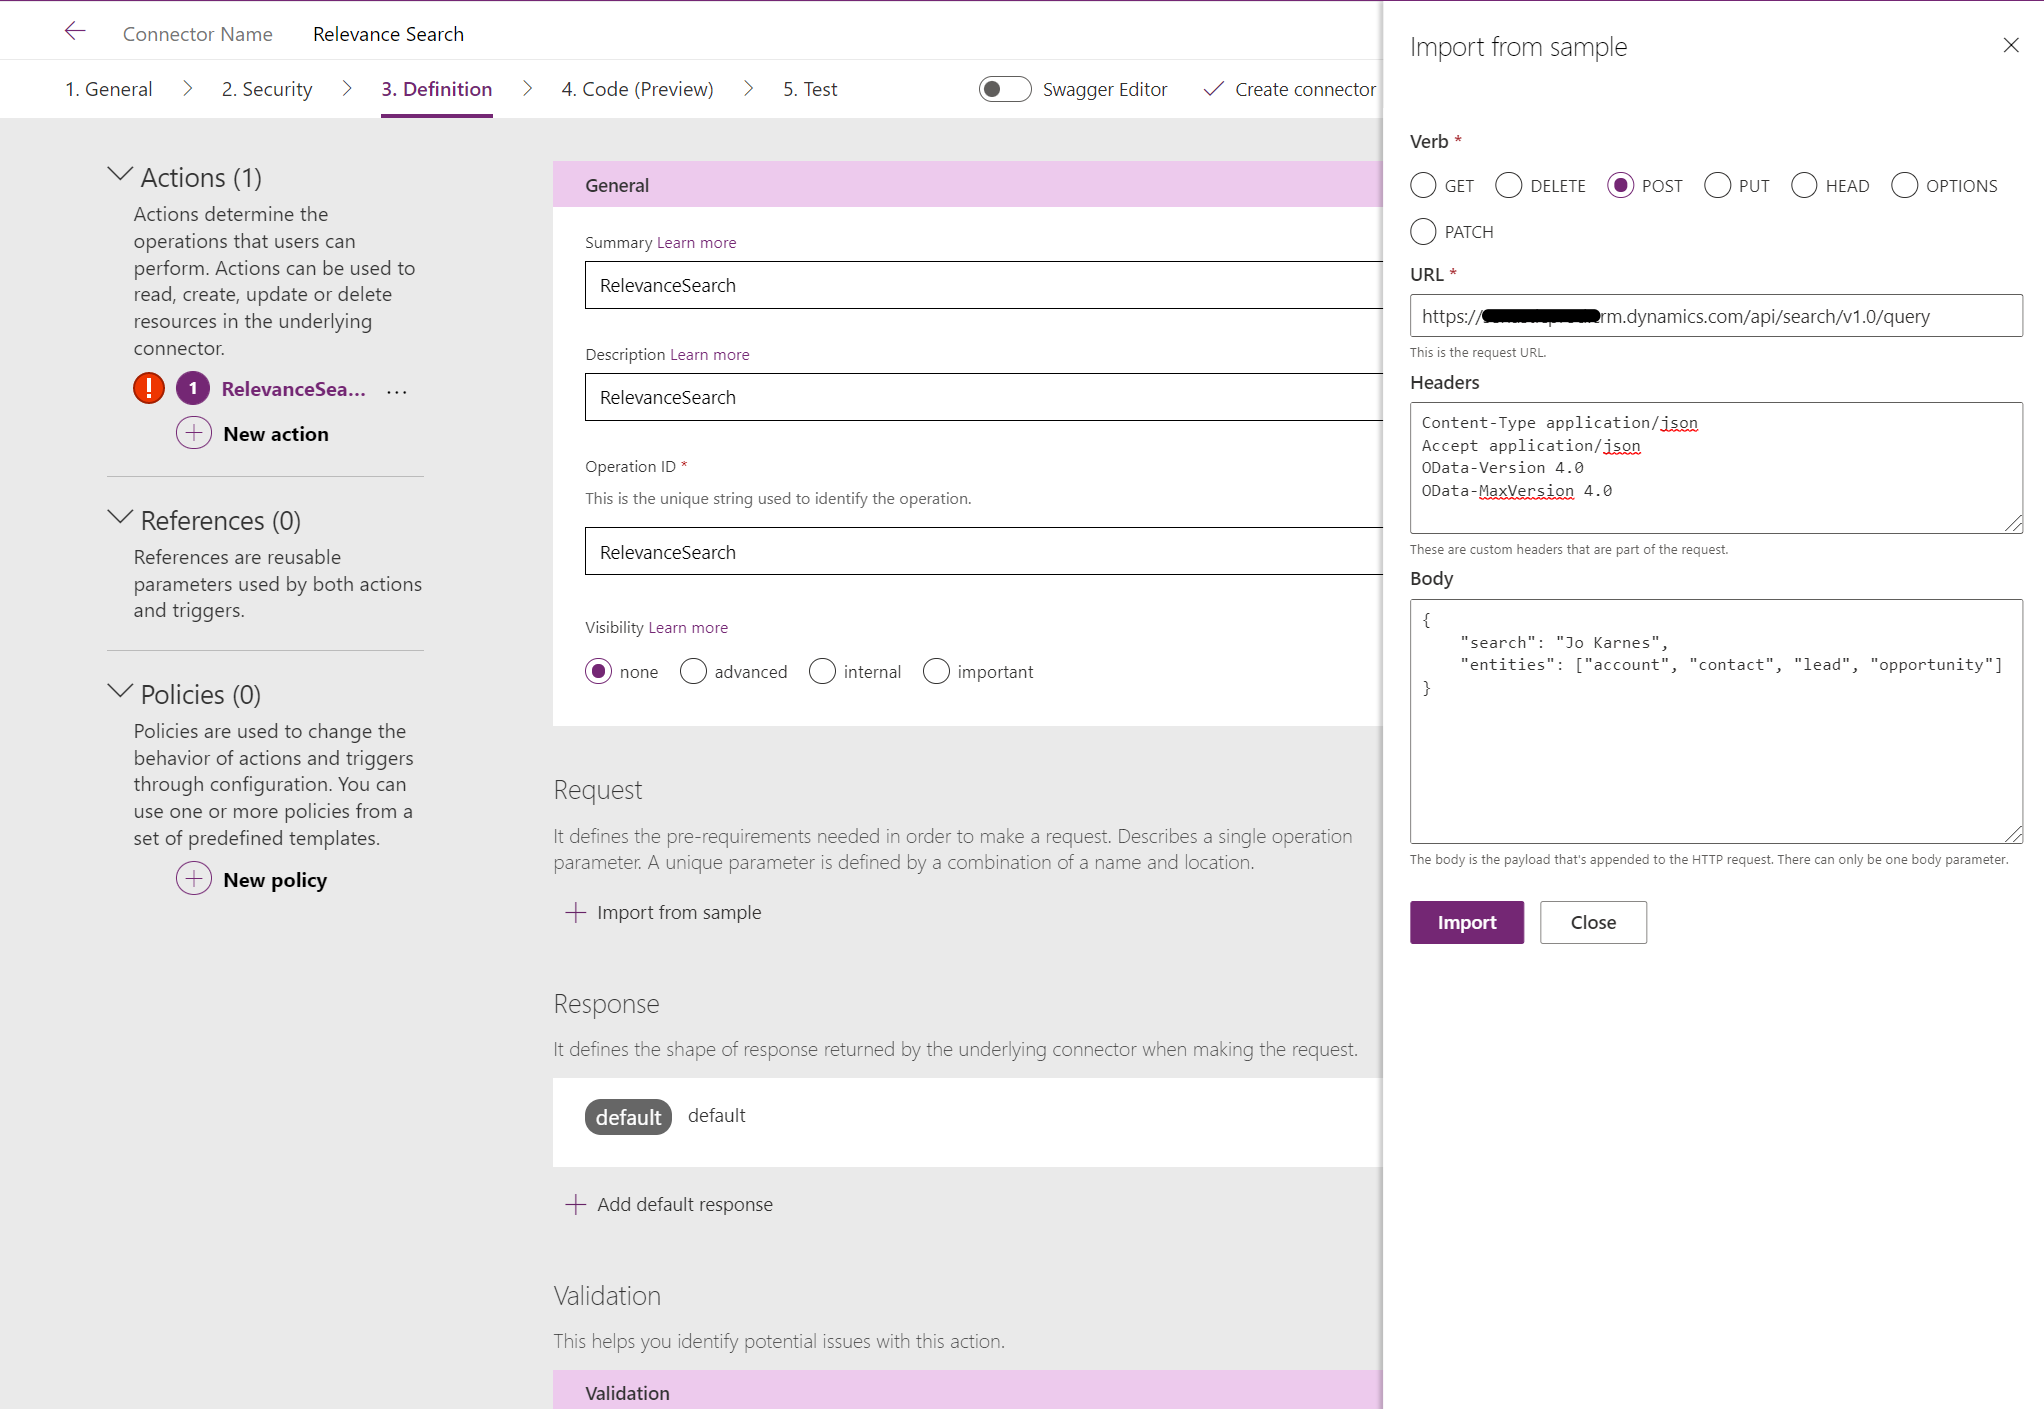
When we get to Definition, the first thing we want to do is to create a new Action. You can name this anything you want, I just kept mine as RelevanceSearch for the Summary, Description, and Operation ID. Next, we’ll want to import a smaple for the Request. From here we can define what a typical request would look like. For the Verb, choose POST, for the URL, the format of the URL will be : https://<environment url>/api/search/v1.0/query
For the Headers, we need to add the following Headers and values into the Headers box:
Content-Type application/json
Accept application/json
OData-Version 4.0
OData-MaxVersion 4.0
And finally, for the Body, we’ll pass in an example JSON request. For this sample, I’ve included the “entities” definition, as our requirements was to limit our results to just those 4 tables:
{ “search”: “Jo Karnes”, “entities”: [“account”, “contact”, “lead”, “opportunity”]}
When finished, click on “Import”
Next, we’ll want to define the response. This is the schema that Power Apps expects to get back from the API. The easiest way to get the return schema is to copy and paste it from a response in Postman. Just copy the entire response, and paste it into the “Import from Sample” section for the custom connector.
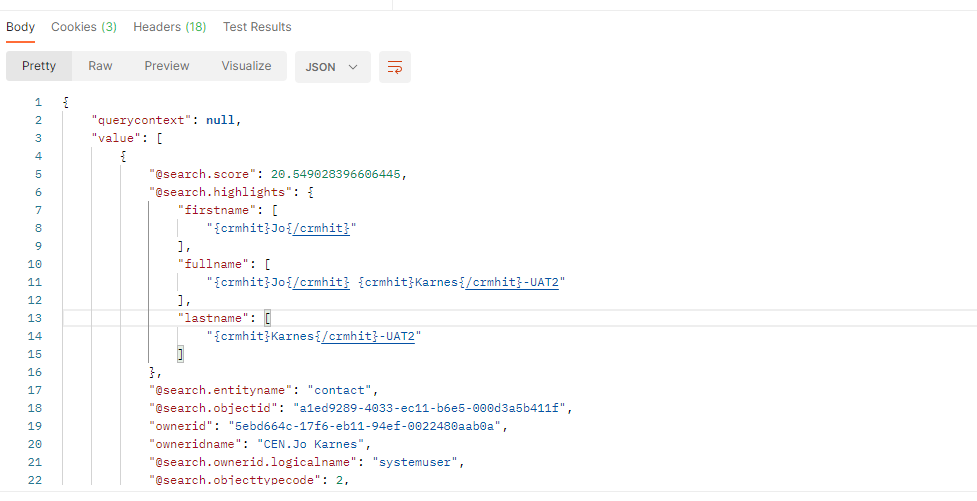
NOTE: For whatever sample response you use from postman, make sure to include results from all entities you have defined. This way, if you have custom fields that should be returned by these entities, they’re included in the response and PowerApps will recognize them.
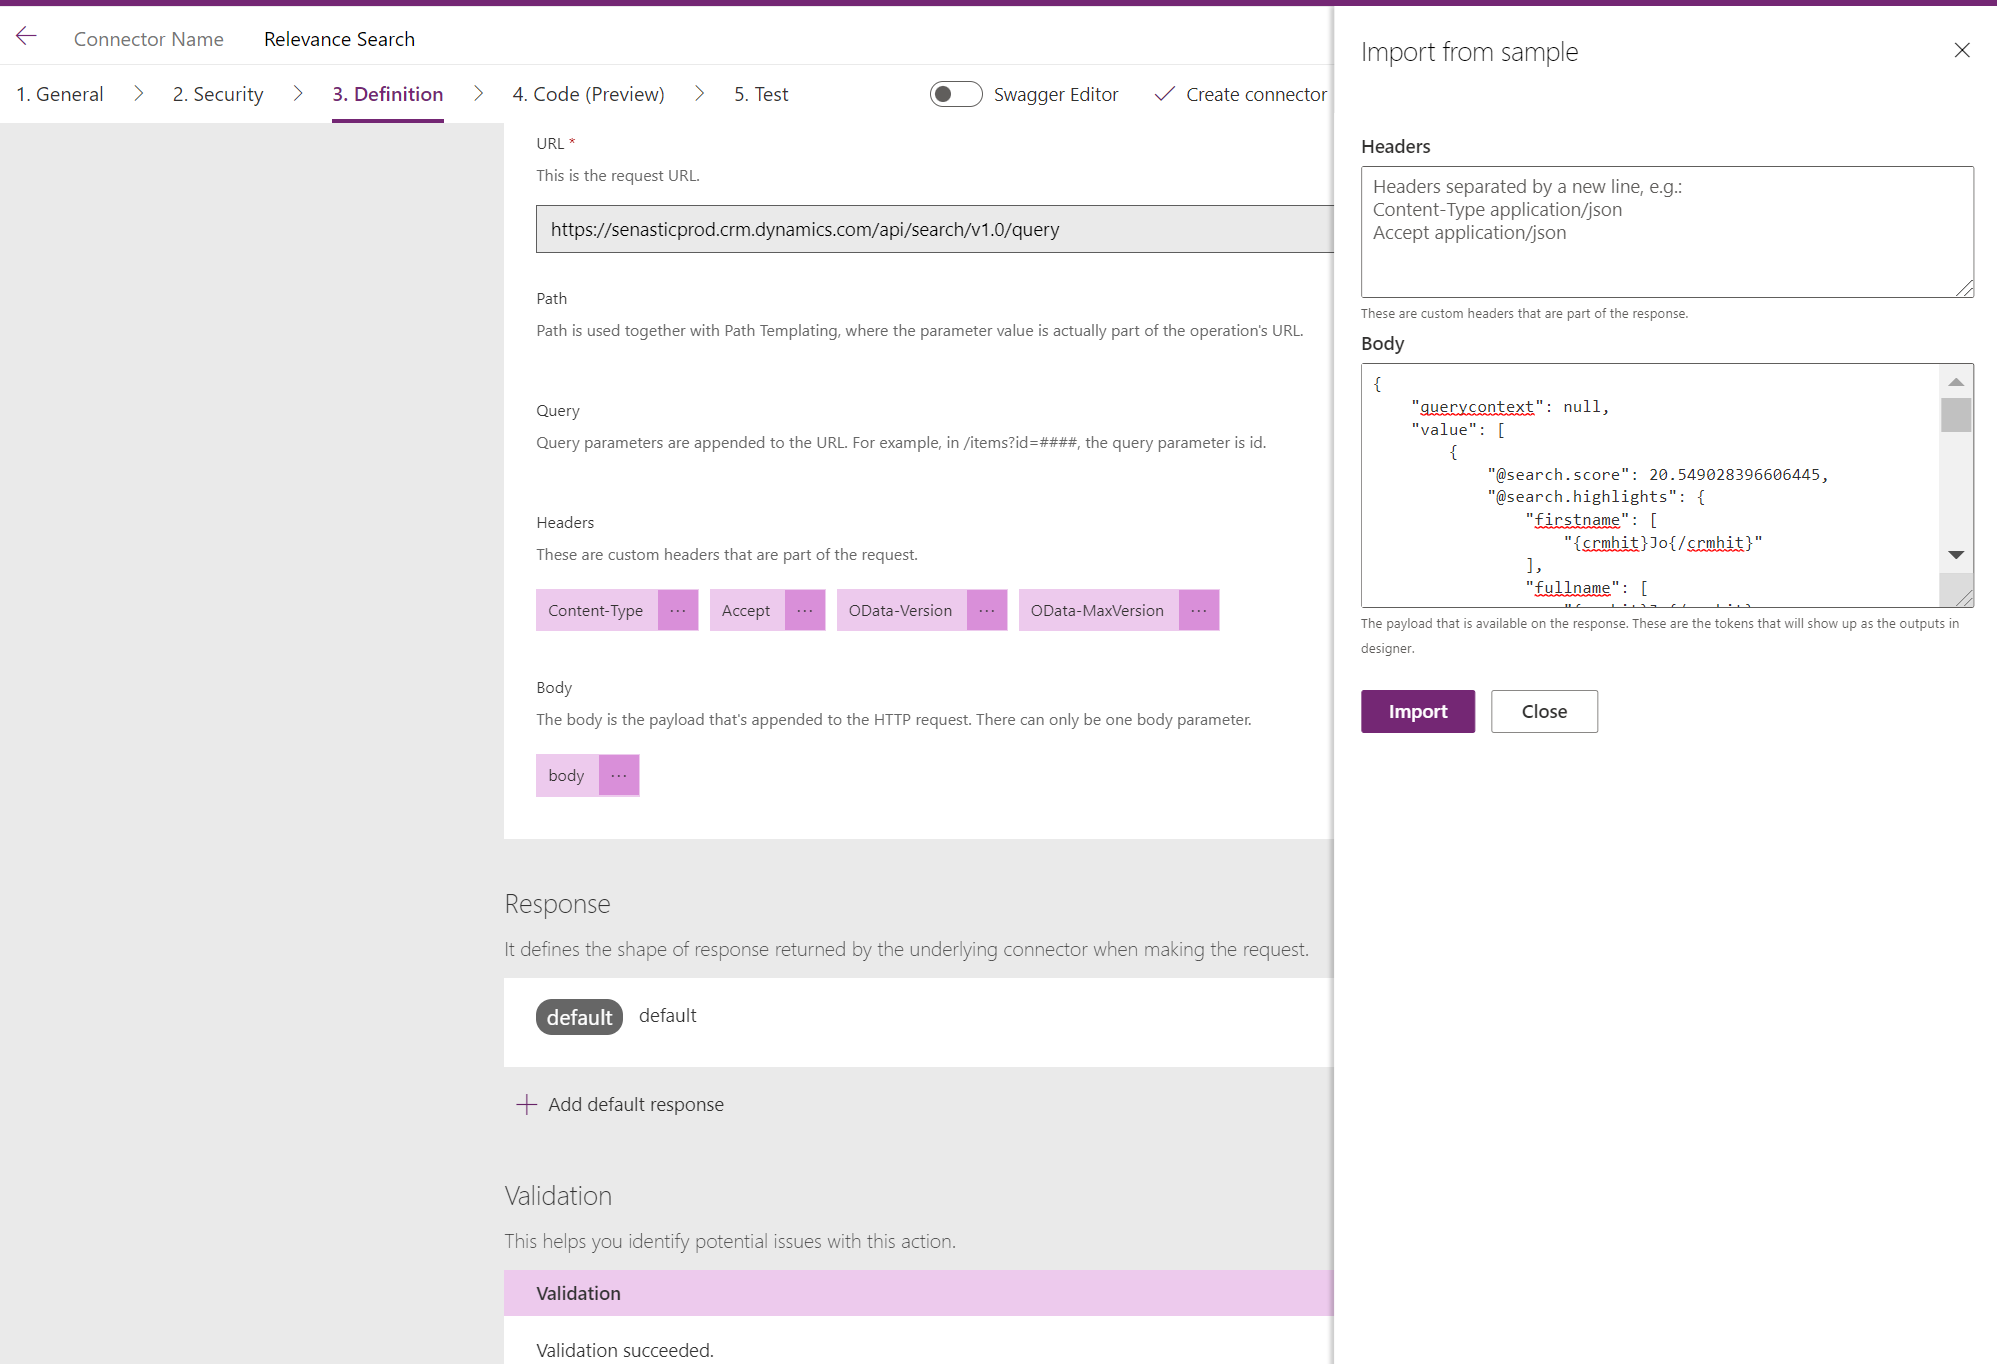
Once you’ve imported the Response, you may get a validation error. You can safely ignore this, I haven’t seen any impact when returning data.

Finally, you can choose to test the connector, of you can just click on “Create Connector” to save the conenctor.

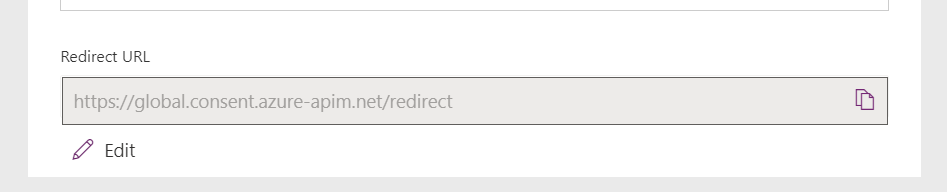
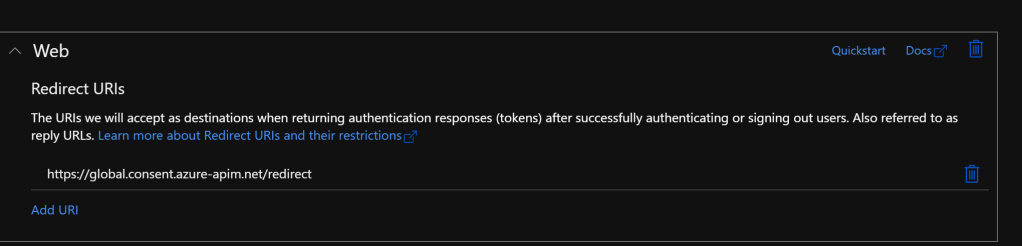
NOTE: When you save the connector, on the Security tab, you will see the Redirect URL that has been defined for the Connector. Verify that the same Redirect URL is defined on the Azure AD App Registration, or you may encounter an authentication error.
Let’s make an App!
Now that our Custom Connector is defined, we can create a Power App to use to search. Our first step is to Create a blank Canvas App, and the Add the custom connector in.
Next, add 2 controls. The First is a Text Input box, and the Second is a Blank Vertical Gallery. See the example below.

Now, we need to modify the “OnChange” value of the Text Input box. This way, any time we type in a search, it will communicate with the API to get our results (NOTE: the “OnChange” value will only execute when the Text Input box loses focus. It might be helpful to just add an icon that people can “select”, which will then move focus off of the Input box). We’re going to Set a variable called varRelSearchResults, which will pass the Text from our Text Input box to the API, and collect all of the results into a Variable.

Change the “Items” property of the gallery to varRelSearchResults. Now you can add any controls you want to display on to the template of the Gallery to show your results!

In Conclusion
I hope this is something you may find useful, especially if you have want to be able to connect to custom API’s for Dynamics. Please check out some of my other articles to take a deeper dive into the product, and as always, please feel free to reach out to me at jo.karnes@centricconsulting.com
