Recently, the company I work for (Centric Consulting, check us out!) held a Hackathon to get our consultants a bit more exposure to Machine Learning. It was a day and half of different teams putting together something that could demonstrate what Machine Learning is, and how it could be used. In the case of my team, we used some data to try and predict how long an employee could be expected to stay at a certain organization.
This was my first foray into Machine learning, so it was not a complex model by any means. I used the Azure Machine Learning studio to build the model, and one of the thing I noticed was that it could also setup a Predictive Web Service to interact with the model. By default you can use Excel to input data into the model and get a prediction as an output, but that was way to bland and boring for me!
You just know I’m going to use PowerApps and Flow for this…
So, we need to have something ready in a day and half, I am absolutely firing up these two to get something out there fast. But with connecting to an ML web Service, there are some caveats:
- There currently is no Azure ML Connector.
- This means it has to be a Custom Connector.
- Microsoft yanked the ability to use Custom Connectors from the licensing model included with Office 365 (Seriously Microsoft?). Which means you need a P1 or P2 license.
Now, since I only needed this to work for a short amount of time, I was able to use a P1 trial, but be aware of the above if you want to work with Custom Connectors.
Let’s Start with Flow

I wanted Flow to handle the input/output of the data for a few reasons. Flow is much more flexible with sending and receiving JSON data, and it’s much easier to troubleshoot when you’re connecting to a web service. So we’re going to need to create a custom connector to bridge the gap between the model and Flow.
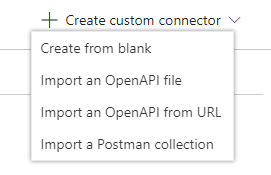
So, we need to got to Flow, expand the Data menu, and click on “Custom Connectors”. On this screen we can now “Create a Custom Connector”. When you click this button, you’re presented with a few options on how to get the endpoint details. The Azure ML endpoint uses Swagger to define the endpoint. In my testing, I’ve found that Import an OpenAPI from URL just errors out, so I used “Import a Postman Collection”.
But this also means we now need to create a Postman Collection. So….
Please Mr. Postman…
Postman is an awesome tool if you’re doing any development for API’s. And it’s free! I’m not going to go into the full functionality of the product in this article, but you can download it here: https://www.getpostman.com/downloads/
Once you have it installed, Open up Postman, and in the top bar, click on “Import”.

Now we need to give Postman the URL to our Azure ML Service Swagger doc. You can get the endpoint from your Azure ML Service Dashboard:
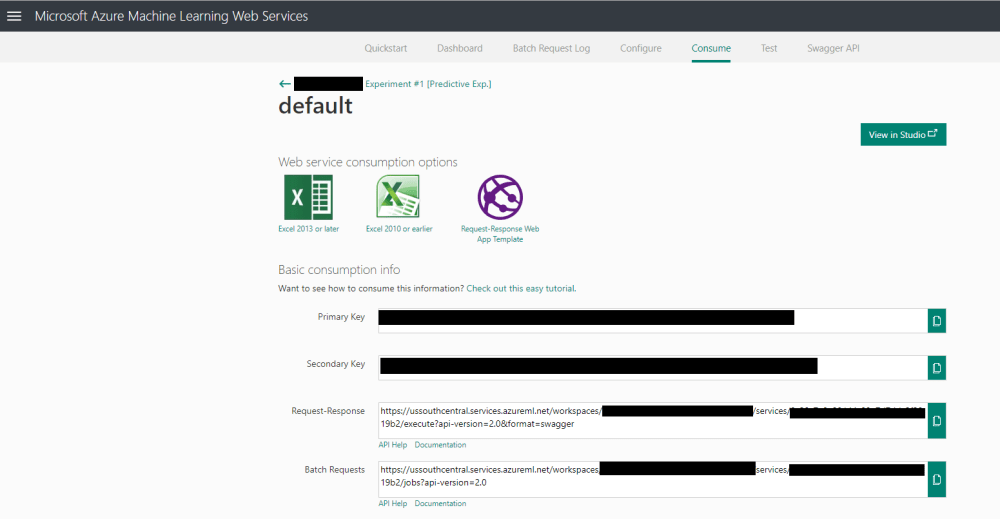
In my Case, I will be using the Request-Response endpoint (as this sample PowerApp won’t be doing batch requests). So I need to take the URL they provided me, but I need to replace the /execute?api-version=s.0&format=swagger and replace it with /swagger.json This is the correct URL to my swagger document in the service. Now once I click Import, Postman will contact the endpoint, read the swagger document, and provide full details about my API!
Now that we have connectivity to the API, we can test it to ensure it works. I’m going to test the POST functionality of the Request-Response endpoint. Now if I click “Send” to send a request to the endpoint, I just get back:
{
“error”: {
“code”: “Unauthorized”,
“message”: “Request is unauthorized to access resource.”,
“details”: [
{
“code”: “ScoreRequestUnauthorized”,
“message”: “Invalid credentials provided.”
}
]
}
}
The Azure ML Endpoint uses an API key to allow authorization for requests. But how do I add that authorization to my Postman request? Well, the Azure ML service provides a handy Document to tell us the Headers, Body, and responses to expect! Right below where I found the URL for my Request-Response endpoint, there is a link called “API Help”. Clicking on it will bring you to a full document that provides assistance with the API:
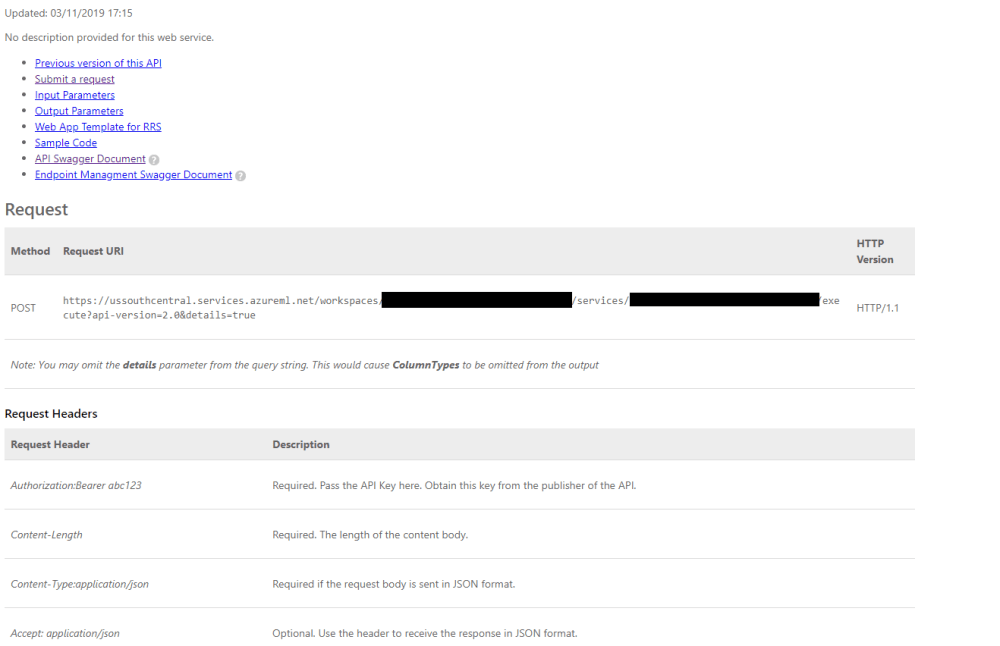
So, in this document, I can see I need an authorization header, that includes Bearer and my API Key. So I can add a header in Postman that looks like this: (I’ve blocked out most of my API key, so hopefully you get the idea:

Now, when I click Send, I no longer get an authorization error! But I DO get an error nonetheless:
{
“error”: {
“code”: “BadArgument”,
“message”: “Invalid argument provided.”,
“details”: [
{
“code”: “RequestBodyInvalid”,
“message”: “No request body provided or error in deserializing the request body.”
}
]
}
}
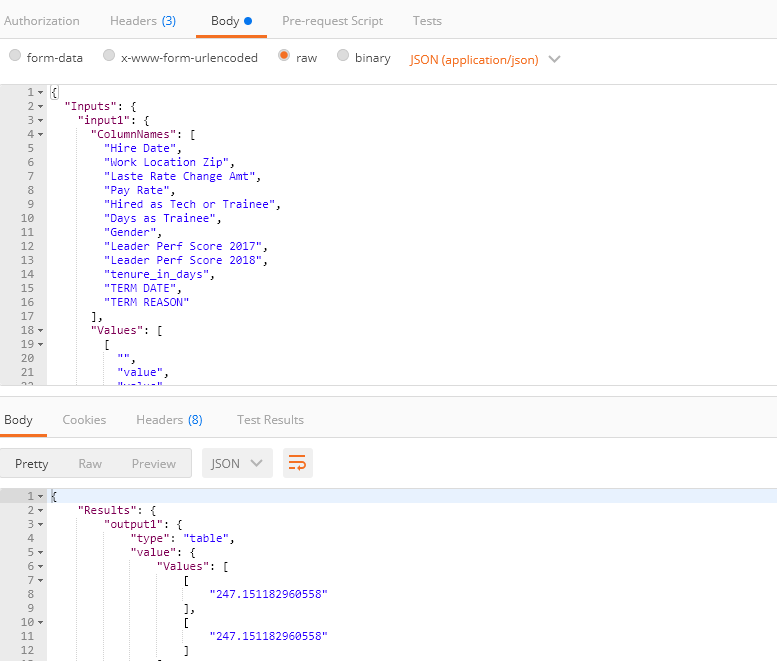
So, lets give our Request a body! The easiest way to do that is to go back to the API Help Document, scroll down a bit, and you’ll see a sample Body request the API expects. 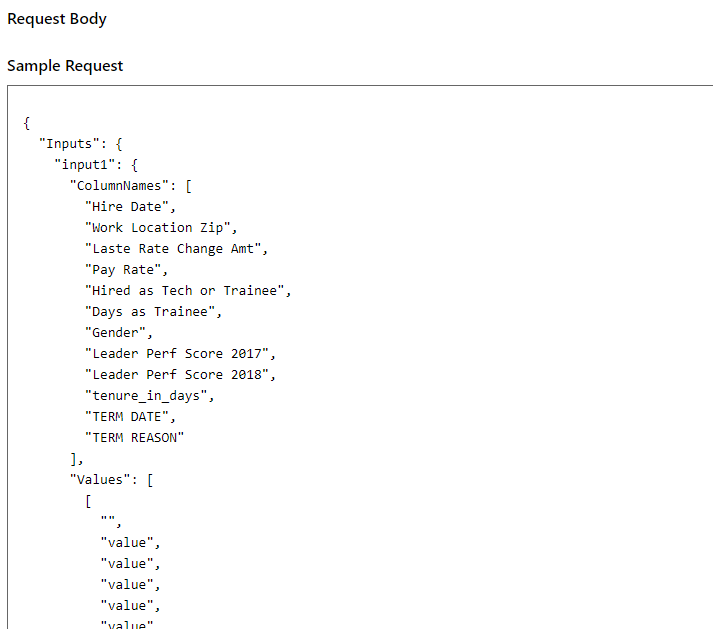
Now, just copy and paste everything in the Sample Request Box to the Body of the Postman Request, and click Send. Awesome, we got a response back!
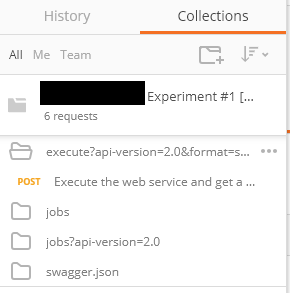
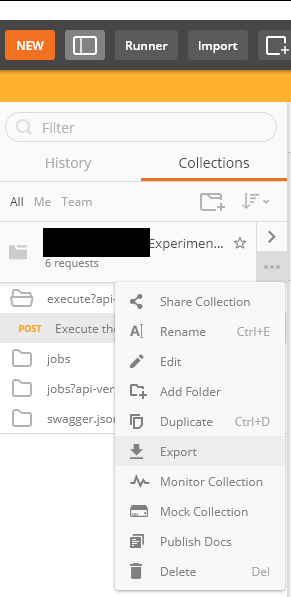
So now that we know the endpoint works, we can Save this as a Postman Collection. To do so, just click on the Ellipses next to the Collection name, and click “Export”:
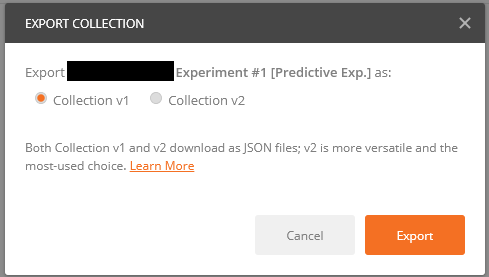
Currently, Flow and PowerApps will only read a Postman v1 collection, so make sure that is set, and click Export. Save the file to a location you can remember:
Ok, NOW let’s connect the ML Service to Flow…
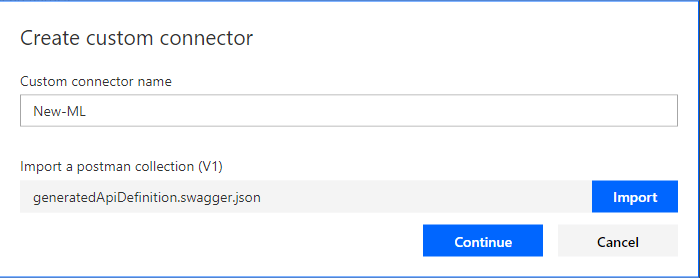
Head back over to Flow, click on “Create Custom Connector” and click “Import from Postman File”. Provide a name for your Custom Connector, and click Import. Find the Postman File we just created and click “Continue”
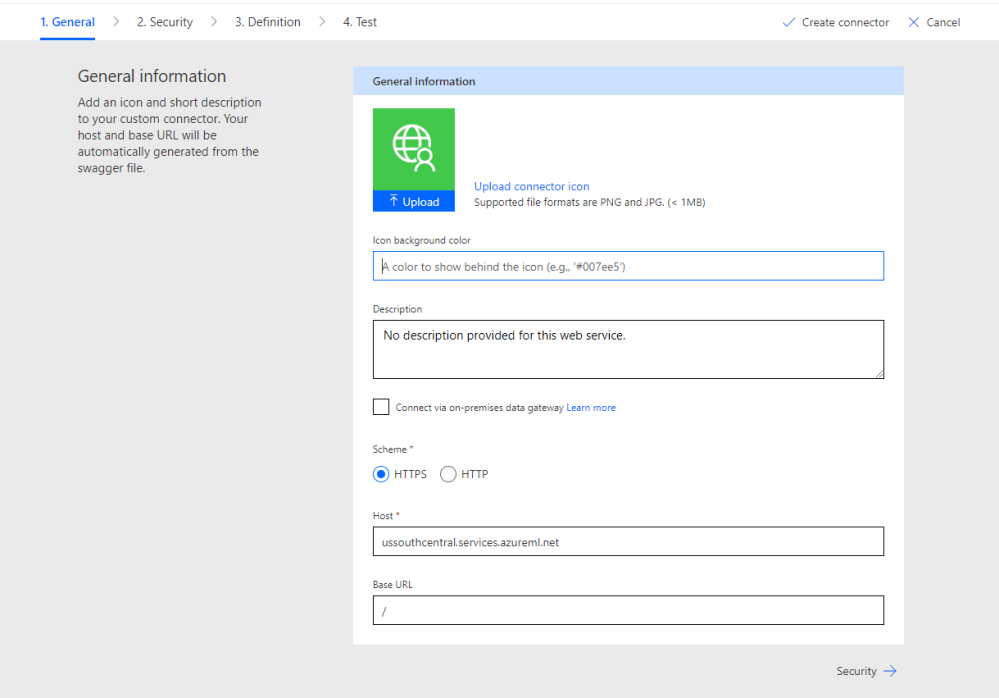
The Postman file will be imported, and we can now further define the Connector. On the General Page you can add a custom Icon or Description:
On the Security Page, we will need to define the security settings that users will need to use to connect to this. Since we’re using an API key, choose that from the Authentication Type Drop down. I named my Parameter label “API Key” but you can choose whatever is more descriptive for you. For Parameter name, enter in “Authorization”, and the location will be “Header”

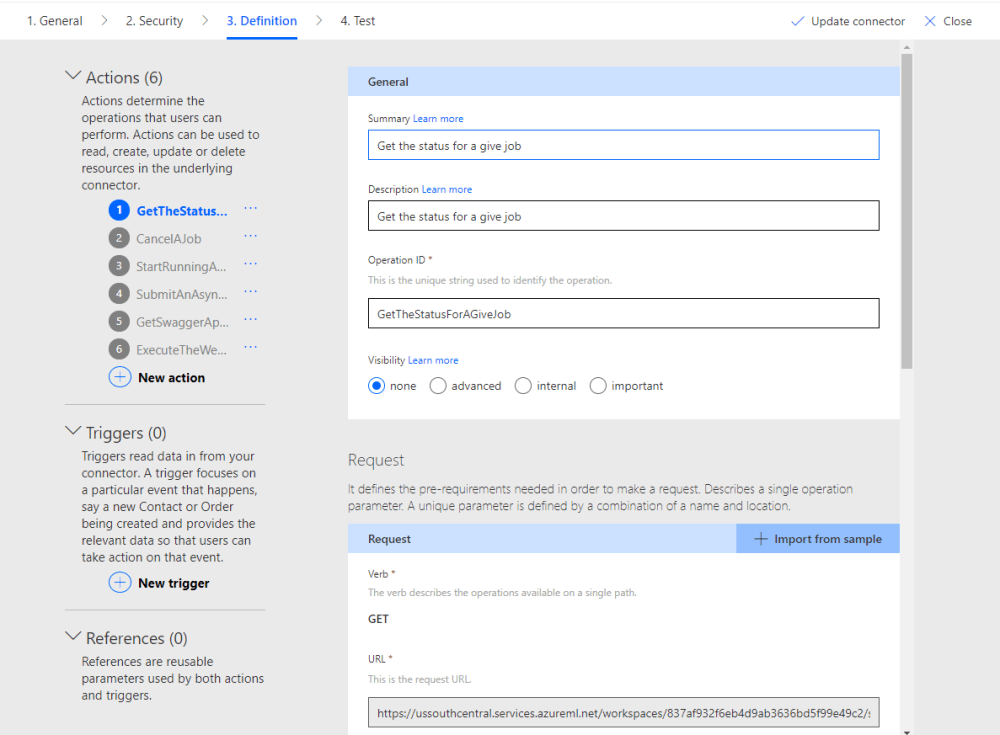
On the Definition tab, you can see all of the information that was gleaned from the endpoint. I recommend just accepting the defaults here, but you can play around with some of the naming if so desired:
Finally, click on “Create Connector” to complete the process. (Optional: Once the Connector has been created, you can try testing it from the “Test Tab”)

Congratulations! You’ve now successfully connect Microsoft Flow (and PowerApps) to an Azure Machine Learning Web Service. In Part 2, we’ll create a sample Flow and PowerApp that takes advantage of this new Custom Connector! Please check out some of my other articles to take a deeper dive into the product, and as always, please feel free to reach out to me at jo.karnes@centricconsulting.com
